
 Ribbing
If you are left-handed, then change the option below, and all diagrams and descriptions will alter to suit you.
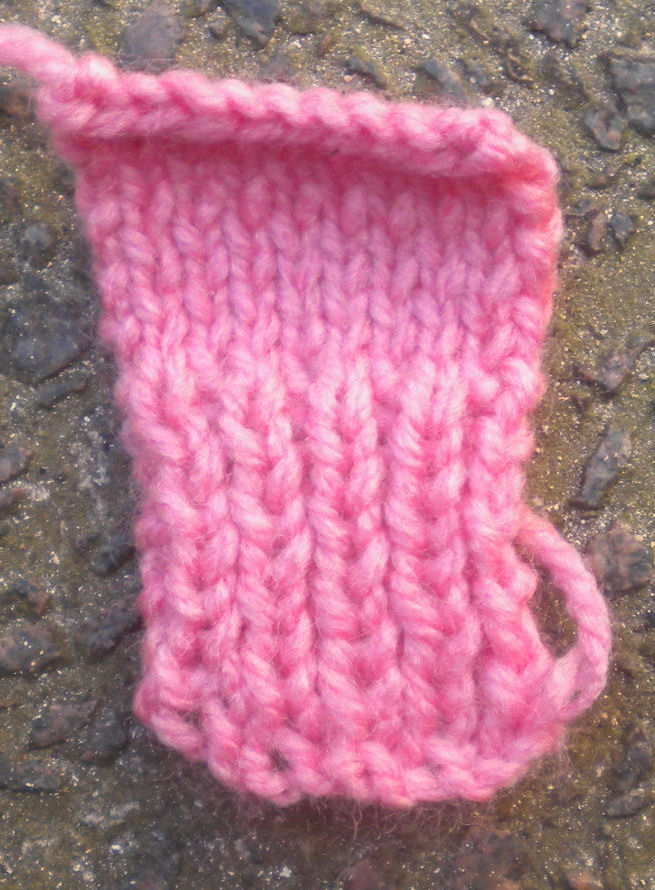
Ribbing uses both knit stitch and purl stitch in the same row. It is often used for cuffs or the bottom of a jumper, because it takes up less width, so is closer to the wrist or body. This can be seen in the photo below. This effect may be increased by using thinner needles for the ribbing than the main part of the knitting.
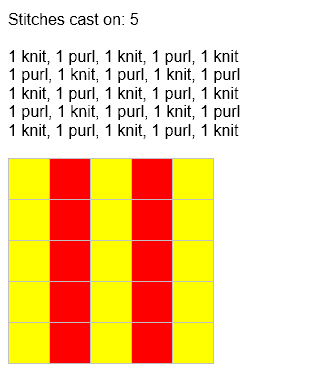
Ribbing is made of columns of smooth (stocking) and knobbly (reverse stotcking). The simplest form of ribbing has columns one stitch wide, as shown above, and that is what I am describing below.
The first row has alternate knit stitch and purl stitch. Since you are changing stitch within a wool, you must keep an eye on where the wool is. For knit stitch, the wool must be behind the knitting, and for purl, the wool must be in front. So when you change stitch, you must adjust the wool to the other side of the knitting. Do this by taking the wool between the needles.
For the next row, you must have a smooth stitch on top of a smooth stitch, and a knobbly stitch on top of a knobbly stitch. However, since you turn the knitting round, it isn't as simple as just doing knit stitch on knit stitch and purl on purl! You are working in the reverse direction as well. What you need to do is look at the stitch in the row below and do the opposite stitch - purl on knit stitch, knit stitch on purl. Or you can just knit alternate knit stitch and purl, in which case you will either get it right, or 100% wrong!
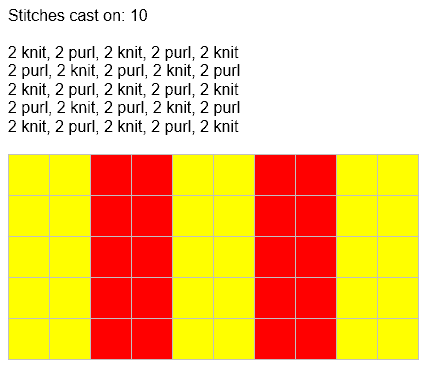
If you look at the patterns below, you can see that for an even number of stitches in a row, each row will be knitted exactly the same. For an odd number of stitches in a row, you need to change from knit, purl, knit, purl to purl, knit, purl, knit.
This sounds very difficult. In fact, you get used to how the stitches feel to knit, and where the wool is, and it starts coming naturally.

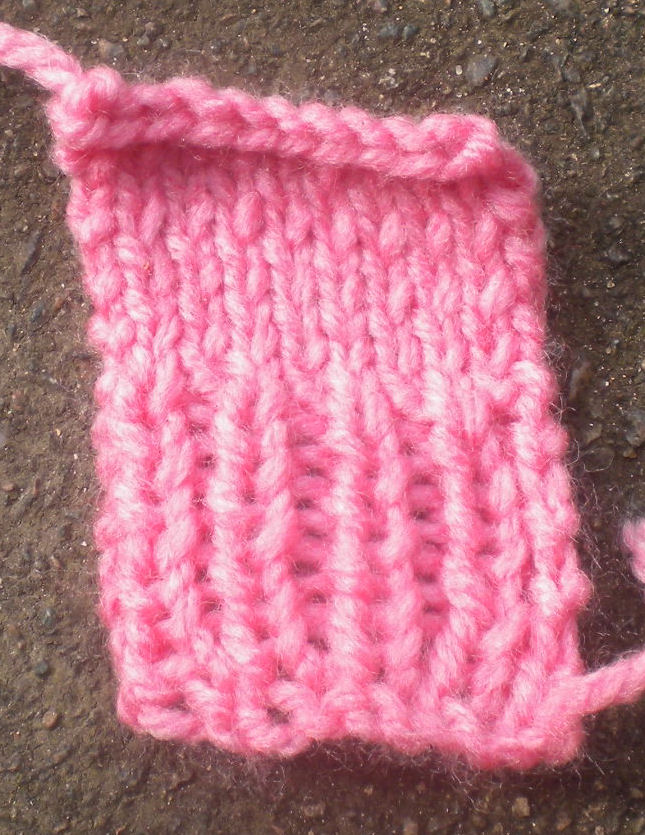
Ribbing looks much the same on both sides. The columns are offset slightly, but it isn't noticeable.
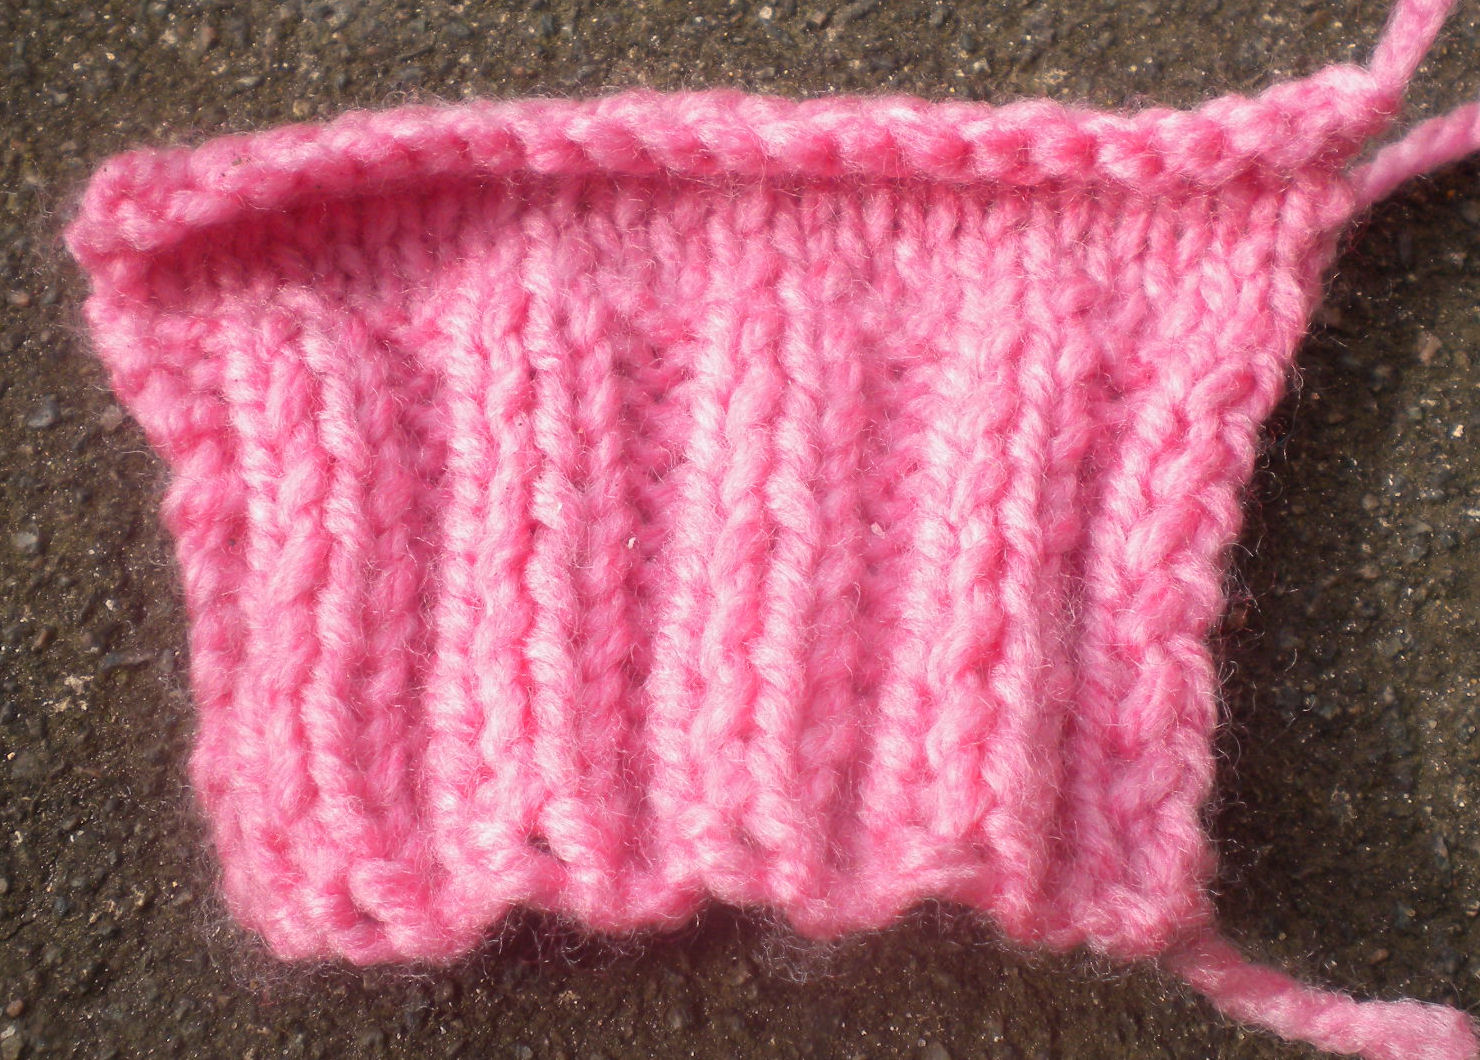
The smooth stitches push themselves closer to you, hiding the knobbly stitches. So the photo above appears to show a row of five stocking stitch rather than ten ribbing. The photo below shows the same iece of knitting stretched sideways, to show the hidden stitches.
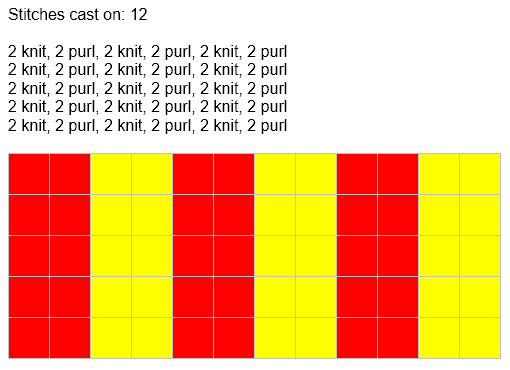
You can have wider columns of smooth and knobbly - say two knit, two purl, two knit, two purl (for the first row).
To make the second row exactly the same as the first row, the number of stitches in a row must be divisible by four. Otherwise, you do the opposite stitch to the stitch in the previous row - knit stitch on purl, and purl on knit stitch.
© Jo Edkins 2021 - index to all my websites - any questions or comments, email me