
See pillows and bobbins for the type of pillows and bobbins that you can buy online or at a lace fair. I must emphasise that these alternatives are for people (like me) who do not want to spend money on equipment when starting this new hobby. Once you decide that you are going to take lace seriously, I think that you will want a proper pillow and bobbins.

It is quite possible to make your own pillow. My first pillow is above - a piece of expanded polystyrene with a sheet of cardboard at the back to stop it breaking, and carefully covered in fabric. It was far too small! The problem is not where you stick in pins; it is where you keep the bobbins. But I did manage a lace sample or two, and it got me started. I'm not sure that I'd recommend it, though! However, I still keep it out of affection, and it is useful for pricking patterns.

Then I made a more serious pillow (above) from a suggestion in a book. There is a sheet of plywood (cardboard would be too flimsy). The covering is a square bag of fabric, made with an open side, slightly bigger than the plywood base, which is put inside. The bag is filled on one side with stuffing, but it must be rammed in as hard as possible. Then the open side sewn up (and it would have to be by hand - remember that you have a rigid bulky pillow with stuffing spilling out of it!) I used it for some time, and it worked OK, but it always had a soft spot in one corner where I did not manage to stuff it hard enough. And I found it hard to get good stuffing. I used expanded polystyrene beads from a haberdashery department, and they got everywhere.
Finally I decided that I was being silly, and bought myself a decent pillow.
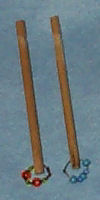
It is possible to make bobbins as well. Bobbins are, after all, just sticks of wood with some way (such as a groove) to stop the thread slipping off the top. Above are two of my first bobbins, made from pieces of dowel from a hardware store, with the grooves cut in with a pen-knife. Certainly not the most elegant bobbins in the world, but they work. Note that I carefully spangled them! With fuse wire and plastic beads, I seem to remember. The spangling is not actually necessary.
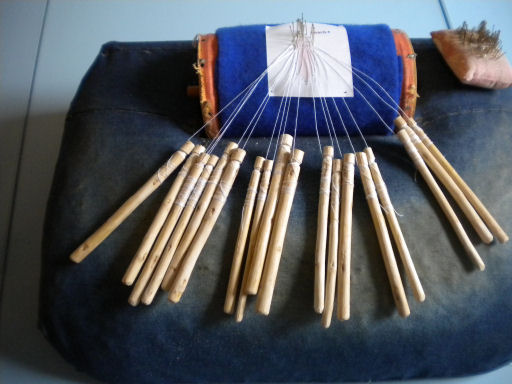
I also made a set of bobbins in a similar way when I cut down a bay tree. The branches were about the right thickness, so I stripped off the bark, and again, cut the grooves round the top with a pen-knife. No spangles this time!

Someone told me about a wonderful do-it-yourself idea for making lace - see above. The pillow is just a folded over blanket. I was worried that the pins would not stick in the blanket firmly enough, but it seems to work. The bobbins are just pencils, with rubbers. You can buy packs of them at a pound shop. The rubbers are necessary because they have the same job as the groove at the top of the bobbin - they stop the thread from becoming unwound. The pencils are really too long, so a bit unwieldy, but it works. And you could always use them as pencils afterwards. Brilliant!

Here is another idea when starting out. The pillow is a piece of flat expanded polystyrene, covered with cloth. The boobins are clothes pegs (or clothes pins). Each one has been divided into two. There are grooves to hold the thread in place. The ends are marked in different colours to high-light the pairs (like spangles). The clothes pegs are flat, so won't roll on the pillow, which is nice. A clever idea!
Another lacemaker came up with an idea when making small pieces of lace. She only wanted small amounts of thread, and it wasn't necessary to wind them round bobbins at all - in fact, that wasted thread. So she attached the threads to big beads! It started me to see all these threads just ending in beads, as though there were just the spangles and no bobbins! But again - she got them to work.

Here is rather an eccentric idea which seems to work. There can be a problem with large patterns, especially a pattern which changes direction, such as a fan. The white bit above is a polystyrene base of a pizza! I washed it, cut it in two and put the two halves together. The fan pattern neatly fitted on top. Then I put the pizza base on a normal pillow (I used a block pillow because it was flat.) The pins go in the pizza base, and if the points end up in the normal pillow then it doesn't matter. The bobbins rest on the normal pillow. There are a couple of pins holding the pizza base in position on the normal pillow. When the bobbins start to hang awkwardly (as the pattern curves round), then it is easy to lift the couple of pins holding the pizza base in place, then moving it round and repinning it. The pattern's pins, threads and bobbins are not disturbed too much. No pins came out and no bobbins unwound themselves, or dragged on the pattern.
© Jo Edkins 2019 - return to lace index