 Simple weaving


 Simple weaving

Weaving usually done on a loom, which is expensive, and takes up room. Here is a simple way of trying on weaving, with no specialised equipment at all.
I suggest using wool. It's certainly possible to weave with manu different types of thread, but wool is nice and thick, so requires less work! You can often buy wool from charity shops. This project started because I had bought, cheap, a couple of balls of extraordinary wool (see right). I wanted something to do with it. I tried knitting it - oh dear, oh dear! I decided that weaving might be worth trying. I had a simple child's loom, that thought that this hairy look would just get snagged up everywhere. So I worked out this way of doing it. |
 |
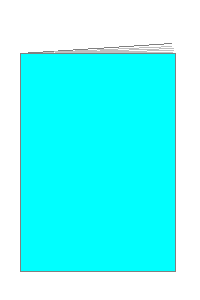
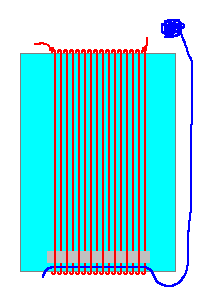
Find a large, thin, hardback book. Wind the wool round once, and tie a knot. Then carry on winding round and round, as close as possible, but without overlapping. Then tie a knot in the last loop, and cut off the wool. These strands of wool are called the warp. (I think of them as being nice and taut. Well, it sort-of rhymes!)
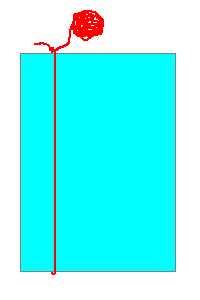
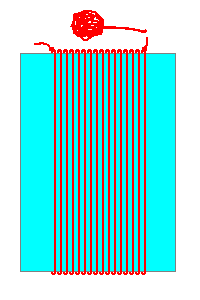
Now for the weft (which, as a weaver told me, goes from "weft to wight!" (left to right).) I've used a different colour, but you could use the same, of course. Push the ball of wool through the warp, so the weft wool goes under one thread and over another. This is the simplest form of weaving, called tabby weave. You might think that there isn't room to get the ball of wool under the warp threads, which should be pulled quite tight! But wool is squodgy... If you have real trouble, then cut off a piece of wool, and weave that until you run out, then get another piece.
Tap down the weft with a plastic ruler, or anything not too thick, long enough and straight.
Push the ball of wool through the warp for the return row, but this time, go over the thread you went under last time, and under the previous thread that went over. This is weaving!
Tap the row again, and pull the wool through. Don't pull it too much! There are two reasons for this. You might pull the wool out altogether. (You can stop this by tying the end of the wool to the first warp thread.) More importatnly, especially forr subsequent rows, is that pulling the wool too tight means that the rows get shorter and shorter, and so the edge of the woven material bows inwards. It may be best to leave a small loop at the end of rows to prevent this.


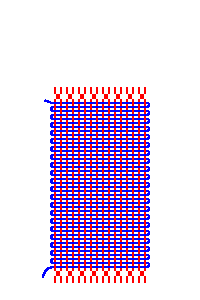
Carry on wih the rows. They should be pushed together closer than this, but I wanted to show the details on the weaving.
Eventually, you decide that you've woven the length you want (or you run out of book!) Cut the warp threads some distance from the weaving, and tie knots in pairs (or more) of them, to stop the weaving becoming unravelled. Do the same to the bottom as well.

There is a way of getting a longer piece of weaving for a given size of book.
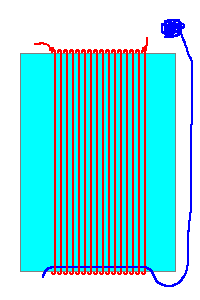
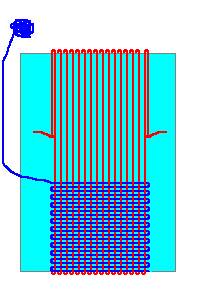
When you do the initial winding of wool round the book, for one end wind it as above (see left picture of the book end). But for the other, do a zigzag. Have a piece of wool (which I've made a different colour to show up better) running along the edge of the book. Wind the wool round this, then reverse the direction of the winding. You will probably have to tie the end piece of wool to the warp thread at both ends.
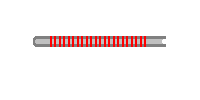
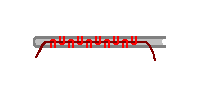
Do the weaving. When you start to run out of room, pull the weaving, and the warp thread, round, so they travel over the bottom of the book and up the back. That will give you more room to weave. Carry on doing rows, and moving the weaving from time to time, and after a bit, the start of the weaving will appear from the top.

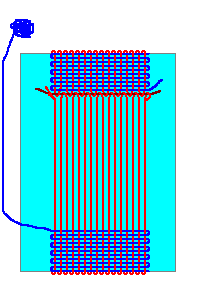
Continue and you will eventually meet the start. Try to get as many rows of weaving in as you can. When you've finished, remove the thread holding the loops of the original winding (it may involve a bit of untying). Then the start of the weaving is no longer attached to the end. You have a pice of weaving twice the length of the book! The weaving may be loose at the edns, so move it around in your hands to even this looseness out.
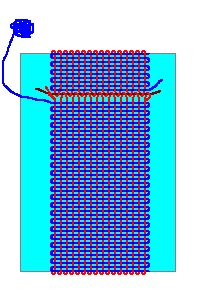

With this type of simple loom, you can make the weave as complicated as you wish.
 |
The description above is about tabby weave (also called plain weave, linen weave or taffeta weave). The weft thread goes over one annd under one of the warp threads. The next line is the opposite. From Wikipedia: Its uses range from heavy and coarse canvas and blankets made of thick yarns to the lightest and finest cambries and muslins made in extremely fine yarns. Chiffon, organza, percale and taffeta are also plain weave fabrics. |
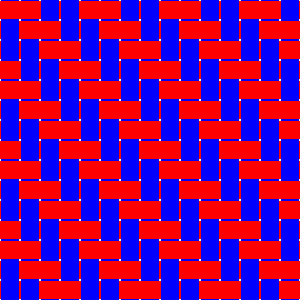 |
Twill has the weft going over one or more warp threads, then under two or more warp threads. THe example on the left shows over two, then under two. The next row moves this along one thread, so under one, over two, under two. You move along one for subsequent rows. The fifth row is the same as the first row. Different types of twill will have a different pattern, but all give a diagonal effect. From Wikipedia: Sheer fabrics are seldom made with a twill weave. Because a twill surface already has interesting texture and design, printed twills (where a design is printed on the cloth) are much less common than printed plain weaves. When twills are printed, this is typically done on lightweight fabrics. |
 |
Satin weave has the weft going over several warp threads, then under one. Subsequent rows have to be offset, but I'm not quite sure how! I've offset the row by one. Satin weave means that you see a lot more of the weft threads than the warp. From Wikipedia: These floats [the weft going over the warp] explain the high lustre and even sheen, as unlike in other weaves, the light reflecting is not scattered as much by the fibres. |
I invented this type of book loom to use the wool described at the top of this page. I wanted to try a satin weave to see what it was like! I used a thick white wool as warp, and the red hairy wool as weft, and did over 3, under 1, offset by one.
It worked, much to my surprise! You can see the result, below. One side is entirely red and hairy, the other smooth. But you can see that the width varies quite a lot, where I didn't control the weft well enough.
I sewed it to the bottom of a woolly hat. This last winter was cold, and we had outside walks and meetings because of the Covid pandemic and lockdowns. My hat didn't cover my ears, or the back of my neck. With this addition, it now does, and is very warm!
© Jo Edkins 2021 - index to all my websites - any questions or comments, email me