
 Double-sided smooth or double knitting
This uses rib stitch and two, or three, colours.
The problem with conventional mixtures of colour within a row is that the knitting has a distinct front and back, and the back can get quite messy. The technique described on this page avoids that. It produces an effect of the front of stocking stitch on both sides, but in fact to knit it, you use rib stitch. The knitting is twice as thick as normal, because you are knitting two layers at once. This means that for a given number of stitches in a row, you produce knitting which is half the normal width. It is called double knitting.
Two colours
Cast on as usual. I've used only one colour for this, and introduced the second colour later, but it is possible to cast on with two colours. I think you will find it easier if you have an even number of stitches in the row!
All subsequent rows are knitted using two colours throughout the row. Rib stitch means knitting alternate knit and purl, and this is what you do. When doing the knit stitch, make sure both wools are behind the knitting, but only use one of them to actually do the stitch. That will be the colour which is on the current side of the knitting facing you. Then bring both wools between the needles for the next stitch, which will be purl. You use the other wool for this, and this colour will show on the other side. Carry on doing this.
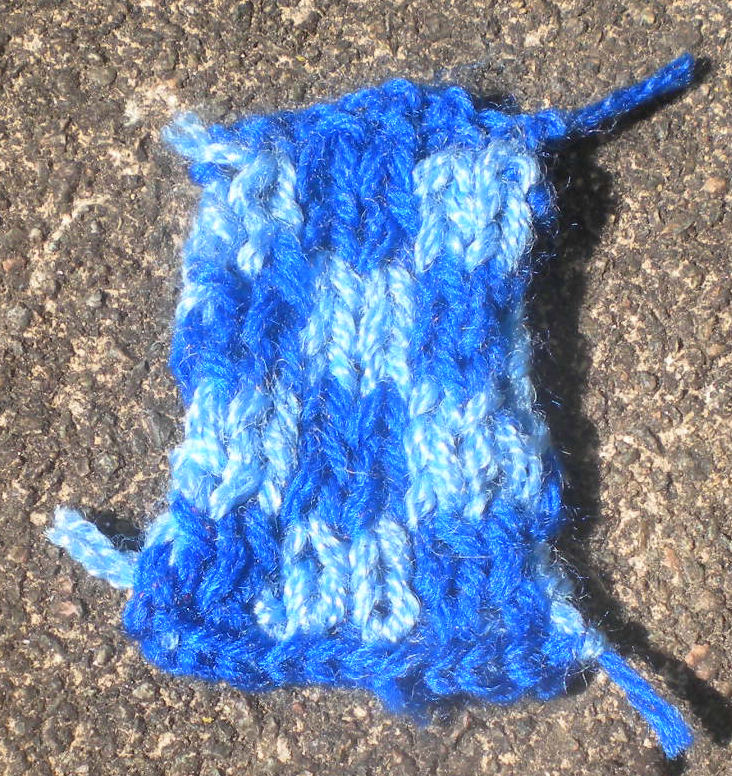
If you continually use the same colour for knit, and the other for purl, you will end up with two completely separate pieces of knitting! (Except they will be joined at the bottom, and top.) So at some point in the row, you must alter the colours used for the knit stitch, and the purl stitch. This is a simple chequeboard pattern, so on the first row, the first 4 stitches use colour A for one side (knit) and colour B for the other (purl). The next four stitches - you carry on doing alternate knit and purl, but this time use colour B for the knit and colour A for the purl. And so on. It's quite easy to change colour, as both wools are brought forward (or back) and you just choose which one you should use. This change of colour creates the pattern, but it also anchors the front of the knitting to the back! (You might be able to do this anchoring by twisting the wools round each other, but I haven't tried that.)
For the next row, since you are going back again, from the other side, everything is reversed, as usual. So knits become purls and purls become knits, and the pattern is running the other way. If you have an even number of stitches, you are still doing knit, purl, knit, purl etc, but the colours are on the other type of stitch to keep the pattern the same.
For this pattern, after three rows the same, I then reversed the colours for the next collection of blocks.
The effect doesn't show immediately, as front and back stitches are held on the needle. After a couple of rows, the pattern starts to appear.
I found it a bit confusing to work at first. But firstly you have to keep firmly to knit, purl, knit, purl throughout the row. So both wools need to be on the correct side of the knitting to do this - at the back for knit and at the front for purl. Then if you are doing the same colour as the previous row, you can see the colour from the previous stitch on the needle, so select that colour to do the stitch with. But if you want to change colour, choose the opposite colour. Generally speaking, think of pairs of stitches as a unit. They should be knit, then purl, and they should be different coloured wools, with the knit stitch colour being the colour facing you, and the purl facing away from you.

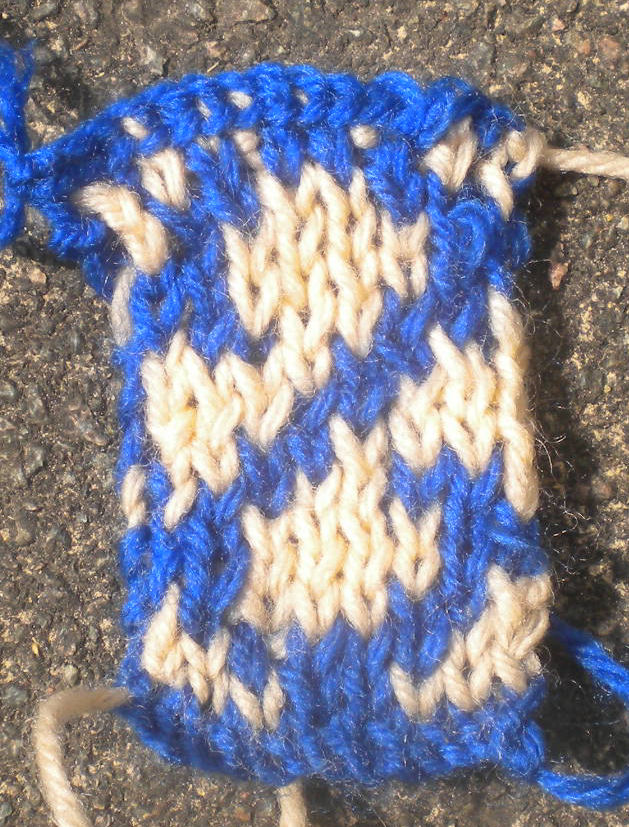
Another pattern:

Three colours
It is possible to use the same technique with three colours. Instead of bringing two wools between the needles with every stitch, you bring three. Again, for the knit stitch, you the coloured wool which will end up facing you, and the purl stitch for the colour away from you. There will be one wool not used at all! This runs between the two layers of knitting, which neatly hide it. Of course, this hidden colour will be used further along in the row, with one of the existing colours being hidden instead.


I must admit that this technique can produce a twisted or even plaited collection of the three wools at the end of each row! You will have to disnetangle them, of course. Perhaps a little more care when doing a stitch as to where the different wools go would avaoid this, but I didn't manage it!
I don't know how many wools can be used with this technique. Presumably at some point, the hidden wools would start to show through the stotcking stitch. Three colours work fine, though.
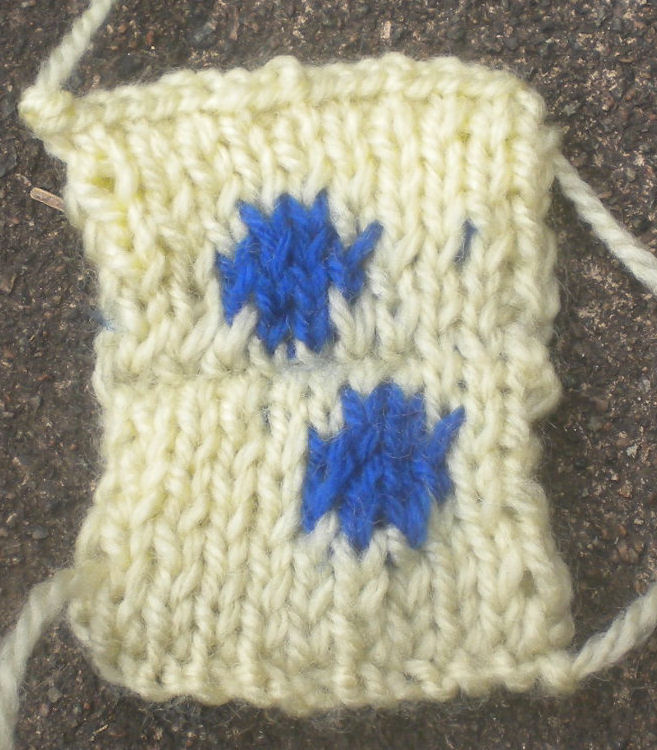
The pattern below uses two wools the same colour (pale yellow) and one wool blue. This means that the blue wool is only used where the dots are, and the rest of the time is hidden.

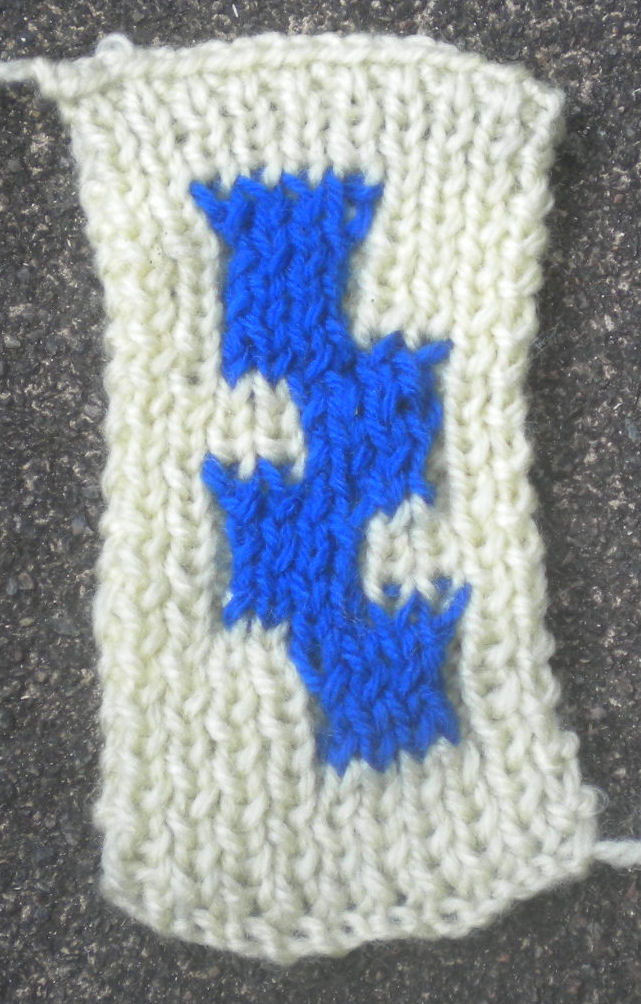
The pattern below looks similar to the one above, but was knitted in a different way. The pale wool is knitted in rib stitch for most of the knitting. The blue parts (on one side) are knitted in double knitting. This means that it only needs two wools, not three. It's only superficially similar. If you pull the rows apart, you can see the ribbing. But it's easier to knit.

A pattern on both sides. This was designed using my online designer, with the pattern shown below. It uses three wools, but two of them are the same colour. It's a bit tricky, as the third colour cannot appear in the same place on both sides of the wool. That is why the "smile" is smaller than the "frown".


© Jo Edkins 2021 - index to all my websites - any questions or comments, email me