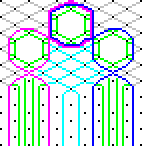
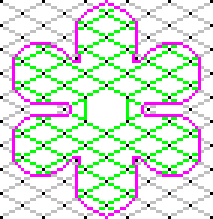
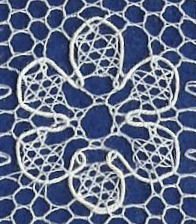
The Bucks Point grid is effective at making flowers with 6 petals.

Flowers alternating with beads. See pattern 71.
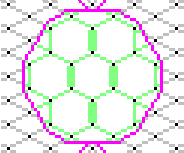
These flowers may use gimps, various grounds and solid hexagons. I suggest that you understand these before trying flowers.
Small flower
 | The simplest shape for a flower is a simple hexagon, surrounded by a gimp. However, it doesn't look very flower-like yet! |
Replace the simple ground with honeycomb, and the petals appear.

Replace the middle with twisted hole ground for a different effect.


Finally, you can replace the middle with cloth stitch.

flower pattern
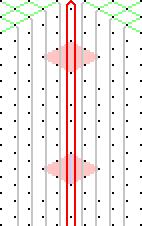
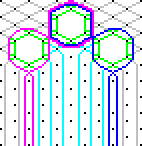
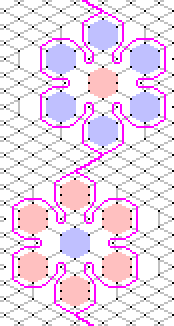
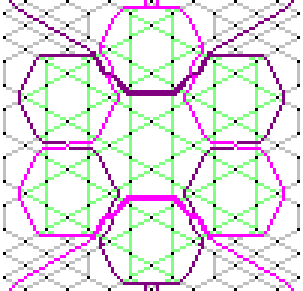
The diagram below shows two flowers, but only one has its working shown in detail. It avoids the complexities of the individual stitches by showing each pair of threads as a single line. Where one line crosses another inside the flower, you should work it as half stitch and twist, pin, half stitch and twist (or honeycomb). The gimp is shown in red. Click here to see how to work a gimp. Outside the gimp is not part of the flower, and so will be worked in whatever stitch is required - perhaps a headside or ground. This is marked in green.
|
|
Working: First work all lace above the flower, down to but not including the gimps. This is marked in green, as it is outside the gimps. There are 8 pairs and 2 gimps to make a flower.
Work the left 4 pairs through the left gimp, and the same with the right pairs and gimps. That means that all 8 pairs have moved from outside the gimps to inside.
Work the middle two pairs (which will be the top ones) in honeycomb.
Work one of these two middle pairs across all other pairs on its side (all in honeycomb). Do the same on the other side.
There are four middle pairs. Work the first couple of these pairs in honeycomb. Work the other couple of these pairs, also in honeycomb.
Work the left-most pair outside its gimp, and do a stitch on the outside. These outside stitches depend on the pattern - it might be ground or headside, for example. They are marked in green. Now the pair crosses the gimp again, and works with a pair inside the gimp, in honeycomb. Do the same on the other side.
You should have all pairs in position to work the middle diamond. This is worked as usual, in cloth stitch or half stitch, according to the pattern or photo. It uses all pairs except the left-most and right-most pairs.
Work the left-most pair across the gimp, then an outside stitch (green), then back across the gimp, then work the left pair from the diamond (honeycomb), then back across the gimp, another outside stitch, back through the gimp and work the inside left pair in honeycomb. (You may have to work a certain amount of lace outside the gimp to make sure you have the threads where you want them to make these outside stitches.) Repeat on the other side.
There are four middle pairs. Work the first couple of these pairs in honeycomb. Work the other couple of these pairs, also in honeycomb.
Work the left-most pair inside the gimp to (nearly) the centre, all in honeycomb. You cannot manage the bottom stitch as the pair is not there from the other side. Repeat on the other side (and this time you can do the bottom stitch). Work the left gimp across half the pairs to the centre, similarly with the right, then cross the gimps (it does not matter which one goes over which!) That completes one flower. Before the next flower, you will have to work the rest of the lace between the two flowers - marked in green.
This is quite complicated. The diagram above sometimes does several steps at the same time as there are too many of them! You may like to see the explanation of beads which is a good introduction to this type of pattern, as it is simpler.
These already give you a number of flower types! But you can also make other changes. The simple grounds are Bucks Point net, twisted hole ground and lattice stitch. You can replace any of these by another without changing the pattern of pin holes at all. You can also substitute Kat stitch for honeycomb, as they both have the same pattern. Finally, you can have a flower with half stitch rather than cloth stitch.
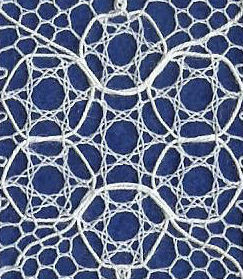
Big flower (4 gimps)
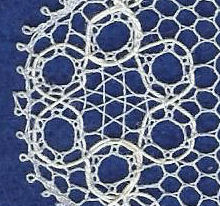
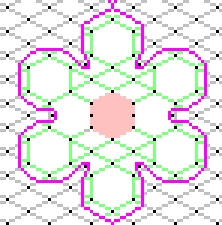
The next group of flowers are based on a larger hexagon.

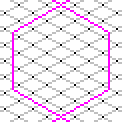
This has honeycomb hexagon holes, to show where the petals and centre are, and a simple gimp round the whole flower. It doesn't look much like a flower! For this size of flower, it is much better to have gimps surround each petal.
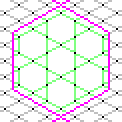
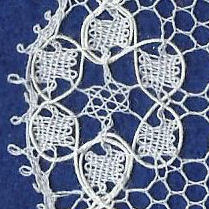
 | The first way to do this requires four gimps. Two gimps surround the petals on each side, making them into beads. The top and bottom petals need to have double gimps on both sides. |
You can also make the petals or the centre into simple ground.
 | Do the doubled gimps at the top of the flower. There should be four pairs inside the gimps. |
 | Work the top petal as a bead. Cross over the gimps so they are ready for the next petals. |
 | Work the second and third petals as beads. There should now be six pairs for the flower centre |
 | Work the ground stitches of the centre, and get the pairs ready for the next petals. |
 | Work the fourth and fifth petals, and cross the gimps ready for the bottom petal. |
 | Work the bottom petal and surround it with the doubled gimps. |
This flower has a twisted hole ground. You can change the centre to a different simple ground, such as lattice stitch.
The petals and centre can also be cloth stitch or half stitch. The petals will have gaps on either side (see solid hexagons). This example has a plait from the top hexagon to the centre of the flower, and again to the bottom petal.

Big flower (2 gimps)
The second method of gimps surrounding petals only uses 2 gimps. A single gimp surrounds the top petal on each side. The gimp goes as far towards the centre of the flower as it can, then back round the outside of the side petals. Each petal gets surrounded as far as possible on the outside. Finally, the gimp goes round the bottom petal on one side, to meet the other gimp doing the same.

It is possible for either the petals or the centre to be simple ground.

This technique requires the gimp to double back on itself between the petals:
 | Sometimes there is a stitch to help keep it in place. |
 | Sometimes the gimp crosses a pair twice, instead. |
 | Sometimes both gimp and pair double back. |
If there isn't a pin holding back the gimp as it doubles back, then it is as well to put a pin there, without a stitch, with the gimp on one side and the pair on the other. You can see the pin marked on the diagrams above.
This technique often has the petals of cloth stitch or half stitch hexagons.

The petals can be honeycomb, with the centre cloth stitch.

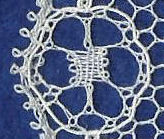
Extra large flower
This flower has stars as petals! These are made with Kat stitch.
The Kat stitch in that pattern could be replaced with honeycomb, or even some simple ground (but you would need more pin holes).
Small flower (type 2)
So far, the flowers have all had a petal at the top and bottom, and four petals in the middle. Here is another possible arrangement.

Here there are two petals, side by side, at the top. The middle has two petals, one each side of the centre, then two more petals at the bottom.
The main problem with this is that since the two top petals meet side by side, there are two pairs of threads side by side as well. This problem is solved by working them as a plait. The pattern shows this as a thicker line.
The centre of the flower can be cloth stitch or half stitch.

Could we have some ground as centre? Yes, we can. Simple ground is easy. But honeycomb (or Kat stitch) will require more plaits. That shows that this type of flower is based on Hexagon ground.

© Jo Edkins 2020 - return to lace index