This pattern will only work with the right sized sticks. Please read Introduction to making a fan.

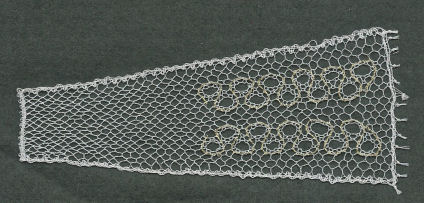
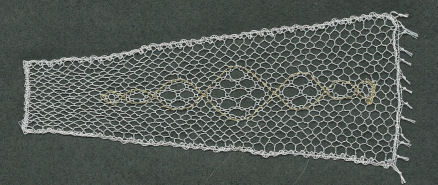
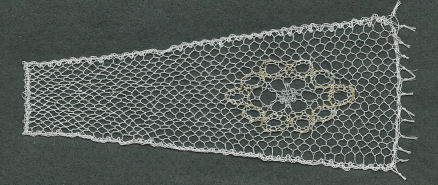
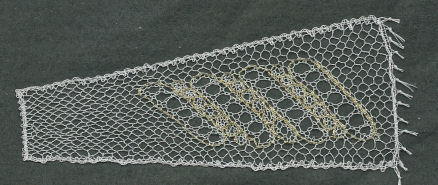
Usually fan designs are a single piece for one fan, running from one side to the other, with the headside/footside at top and bottom. This is a large fan, and it is designed in a different way. Each area beween the sticks is a separate panel, and worked separately. Once finished each panel was stuck on two adjourning sticks, next to the previous panel. This means that the footsides are where the fan sticks will be, at the side of the design. Since the lace is ended in a fringe, this is at the top, so the knots will not interfere with folding up the fan. That means that the start is at the bottom of the panel, and the end at the top. The patterns aren shown as they are worked.
The panels are repeated in the second half of the fan, with the assymetrical designs reflected.
You could, of course, put the panels in a different order, or use less designs, repeated more, as you choose. You could even make your own panel design, using the blank below. I suggest that you lay out the printed designs before starting the actual working of the lace, to make sure the combined design is OK.
Click on the panel picture for instructions.
Basic pattern:
Bobbins: 26 pairs + any gimps used
Style: Bucks Point
Stitches:
half stitch
cloth stitch
half stitch and twist
twist pair
overhand knot
gimp
Details:
solid cloth stitch (red)
Bucks Point net (grey)
making a fan
Description:
Follow the links above for explanation of how to work the different parts of the lace.
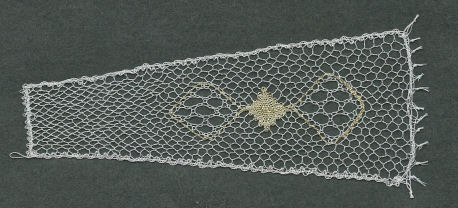
The left two pairs and the right two pairs are white. The rest use a gleamy thread. Any gimps are a pair of gold threads (rather than a single gimp). This was to provide a good contrast to the gleamy threads, but not to have too thick a thread, which might affect the folding up of the fan.
The piece is started with two rows of cloth stitch, using a white pair, and is finished the same way. With the strips of cloth stitch down the sides, this frames each panel. The side cloth stitch strips also help with gluing the panel onto the stitcks. The panel is finished off with overhand knots.
Statistics:
If you are interested: It took me 5 hours to work one panel, and just over an hour to prick and wind on bobbins each time, plus 20 minutes to tie off, remove pins and glue to the fan sticks. So I make that about 85 hours for the lot. The minimum wage for the UK in 2017 is £7.50, so that comes to about £630. The fan stitcks cost £25. The thread was 2 reels of gleamy thread, £7.20, plus some white and gold. Bit silly really....
© Jo Edkins 2017 - return to lace index