
This is a trick to make a curved collar from a straight piece of lace.
Pattern:
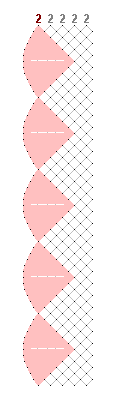
Bobbins: 10 pairs (2 red, 8 gold)
Style: Torchon
Stitches:
half stitch
cloth stitch and twist
twist single pair
Details:
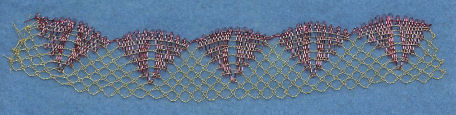
Torchon ground (grey)
Fan headside (pink - dark and pale)
Curving into a collar shape
Description:
Follow the links above for explanation of how to work the different parts of the lace. half way through each fan, twist the middle three passives pairs twice each, before doing the next hole. This gives this line through the centre of the fan. (Twisting once rather than twice might produce a better effect. It's up to you.)
There is no proper footside. Instead, the edge pair gets twisted several extra times (I did 3 twists), then a pin is put to its left. That pair is then ready to work the pin below.
The start and finish is described on the complex start and finish pages - links given above.
When finished, use a needle and thread to run a thread through the holes along the long straight edge. If you want a collar, then run the thread back again so both ends are together. If you want to make a rose (or star) then carry on in the same direction, to make it easier to tug as tight as possible.
Pull both ends of this thread to create the type of curve you want.
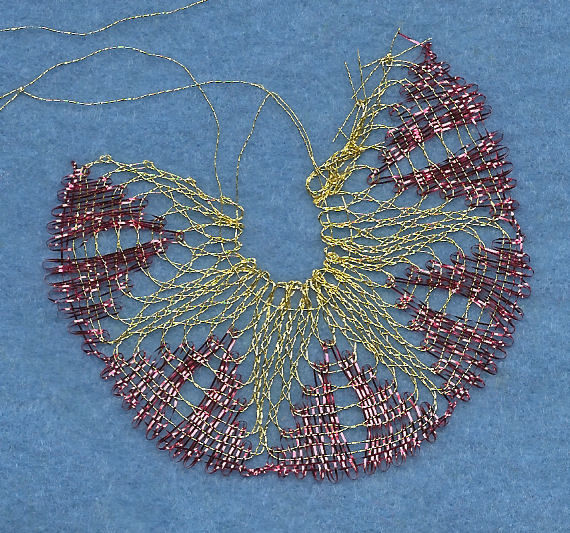
Knot the threads to keep the shape.
Of course, this pattern makes too small a collar, except possibly for a doll. But you can make the collar as long as you want, by repeating the pattern. Click here to see how to do this.
I wanted to try something different. I pulled the thread as tight as possible, making the whole piece of lace curl round into what I hoped was a flower shape, to make a rose. Unfortunately, it turned out looking more like a star! Never mind. I also sewed the start and finish of the lace together.
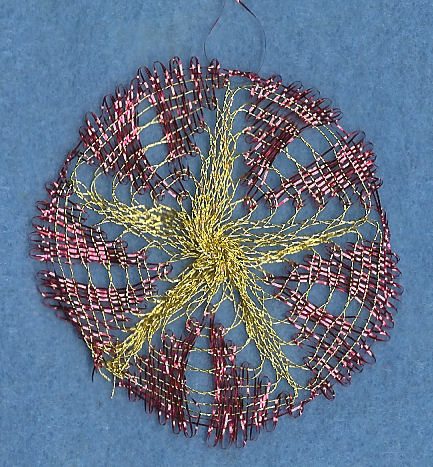
It does show that you can take this idea to extremes!
© Jo Edkins 2018 - return to lace index