
This shows how to make the lace edge of a mat. You will need a pillow big enough for the pattern, plus room for the bobbins on all sides. You will also need to be able to work at the lace from all sides (not at the same time!)
| Pattern: |  |
 |
Bobbins: 10 pairs
Style: Torchon
Stitches:
half stitch
cloth stitch
cloth stitch and twist
plait
twist pair
Details:
half stitch fan (blue)
cloth diamond (red)
Torchon ground (grey)
twisted footside (grey)
corners
how to start and finish
sewing lace onto fabric
Description:
Follow the links above for explanation of how to work the different parts of the lace. This is a square mat with a hole in the centre, in other words, an edge. It is made up of straight pieces of lace (with diagonal starts and ends).

The start is along a diagonal, so one pair starts at each pin, and two at the edge, with extra for the passives. Above, I have marked the position of the false pins. There are two pairs at the top.
Once you have hung all the pairs, do the half stitch fan, then the cloth diamond, Torchon ground and twisted footside. Take out the false starting pins, and pull the threads though to make a neat start. You have now started thye lace, and should be able to see how to do the first side of the edging.
When you need to remove pins from the back, you need to leave the first two rows of pins in the pattern in place, and push them up to their heads. Remove other pins to reuse at the end as usual. You will find that if you don't, the threads will catch on the pins as you turn the pillow a couple of times.
Work down to the yellow line at the bottom left. This yellow line is not part of the pattern. It just tells you where one side stops and the next starts. When everything from the first side has been worked (and the half stitch fan should be last), turn the pillow, so the next edge now goes downwards. Rearrange the bobbins, so they hang downwards properly as well. You can twist all pairs if you want to, to get to the next edge, but it isn't really necessary. However, there are two pairs at the edge. Work these in a plait, just to get them to the start of the next side. Now, carry on working!
Click here for how to finish an edge.
Click here to see how to sew this onto fabric to make a mat. You could extend the pattern to trim a larger mat.
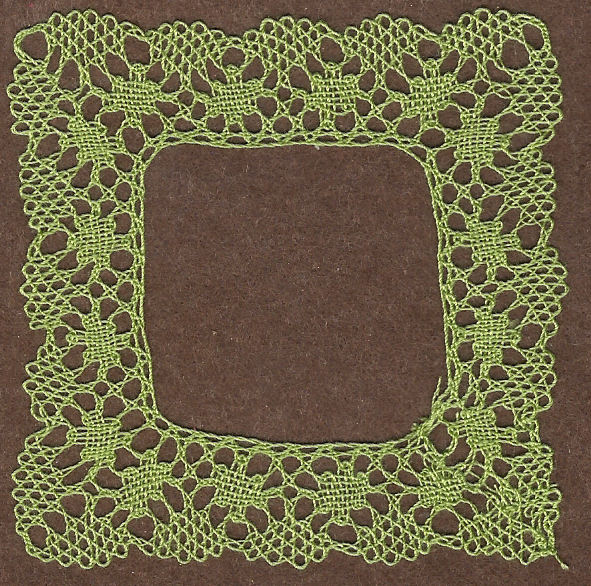
Close up of the lace, so you can see the working in more detail
Click here for more on how to make lace.
© Jo Edkins 2017 - return to lace index