
This could be used as a Christmas tree decoration. Click here for more Christmas decorations.
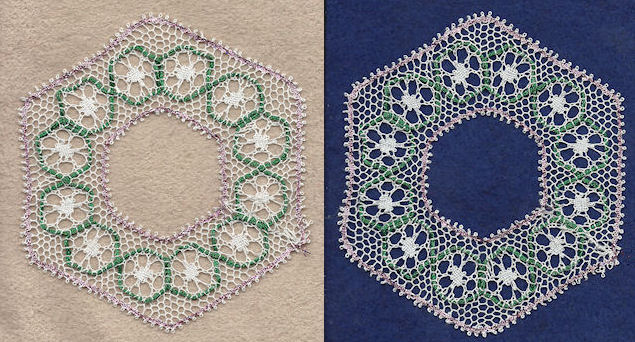
I chose deliberately contrasting colours for the footside passives and gimps, and as a result, it is hard to find a background which shows off both! So I've shown it against two backgrounds to show the two colours to advantage. The pattern is supposed to show Christmas roses.
Pattern:

Bobbins: 16 pairs (4 pairs pink, 12 pairs white) + 2 gimps
Style: Bucks Point
Stitches:
half stitch and twist
twist
cloth stitch
cloth stitch and twist
picot
gimp
Details:
Bucks Point net (grey)
flower (green and red)
picots and passives headside (grey)
corners
how to start and finish
Description:
Follow the links above for explanation of how to work the different parts of the lace. This is a hexagonal mat with a hole in the centre, in other words, an edge. It is made up of straight pieces of lace (with diagonal starts and ends), and as it is a Bucks Point pattern, this creates a hexagonal shape rather than a square or rectangular one.
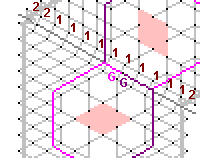
The start is along a diagonal, so one pair starts at each pin, and two at the edge, with extra for the passives. Above, I have marked the position of the false pins.
Click here for how to finish an edge. Remember to leave the first two rows of pins in the pattern in place, and push them up to their heads. Remove other pins to reuse at the end as usual. You will find that if you don't, the threads will catch on the pins as you turn the pillow.
This type of shape is made up of 6 straight pieces. You work down to a dark grey line, then turn the pillow to work the next straight piece. However, since it is a Bucks Point pattern, you turn the pillow through 60° rather than 90°. So you must use a pillow that you can turn and work from any angle, such as a cookie pillow.
I made the passives sparkly pink, to frame the design, and the gimps a dark green for contrast. You can work it all one colour if you wish.
© Jo Edkins 2016 - return to lace index