
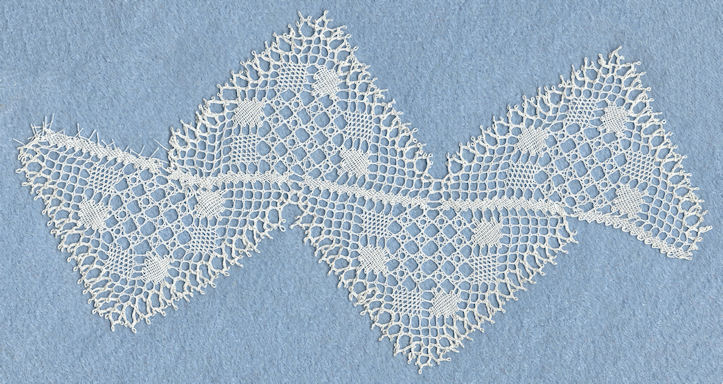
This is a wiggly lace design. Click here for other wiggly patterns.
This design came about while I was trying to make some bobbin lace with deep points on the edge, similar to old lace. See also pattern 276.
Pattern:
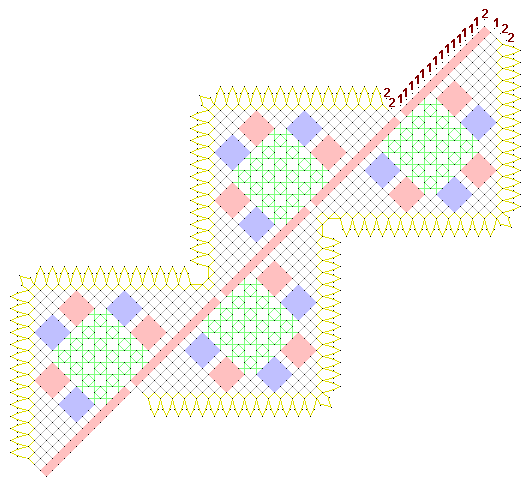
Bobbins: 25 pairs
Style: Torchon (with a little English Midland!)
Stitches:
half stitch
cloth stitch
cloth stitch and twist
twist single pair
picot (yellow)
Details:
simple plaited headside (yellow)
cloth stitch diamond (red)
half stitch diamond (blue)
cloth stitch strip (red)
Torchon ground (grey)
rose ground (green)
how to work wiggly lace
Description:
Follow the links above for explanation of how to work the different parts of the lace.
As usual, you need to work down to the dark grey line, then turn the pillow for the next bit.
Ancient lace seemed to like deep points at the edge. This is easy in needlepoint, but not in bobbin lace! I experimented with various ways of making these points (see inspired by old lace). It occurred to me that wiggly lace produced good points, but of course there were also points facing the other ways. But what would happen if you folded a wiggly lace in two? So I designed a piece to try. The headside is an English Midland style one, as antique lace seemed to like a picotted edge. The cloth stitch strip shows where you fold it, and is intended to replace the footside - something strong to sew into, since this is supposed to be sewn to the edge of a sleeve.
Well, the concept worked... I hadn't allowed for the fact that the pattern got overlapped so much, so many of the diamonds get obscured. Still, there are the points, and they take up half the width of the lace, which are quite deep points. Nothing like real antique lace, of course!
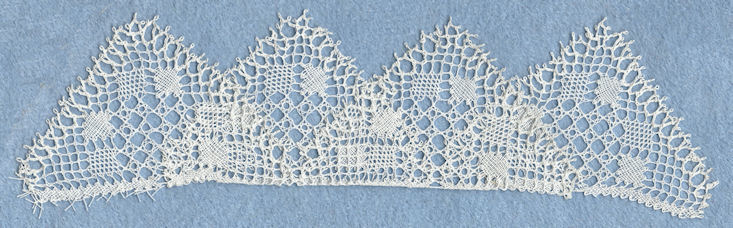
Of course, you don't have to fold it in half! It's quite a striking pattern flat.
© Jo Edkins 2017 - return to lace index