
Click here for more jar cover patterns, plus more information about them.
Pattern:
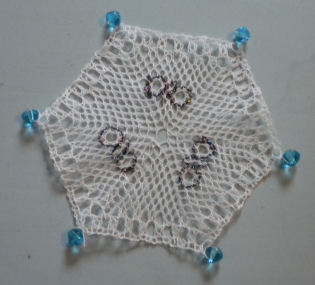
I had already designed a bees jar cover (see pattern 314, but I felt that the bees were too far from the centre to be seen when the cover was in use. So here is a cover with the bees more visible. It is also a Torchon pattern rather than a Bucks Point one as well.
Bobbins: 19 pairs (17 white + 2 dark gimp pairs to surround bees)
Style: Torchon
Stitches:
half stitch
cloth stitch and twist
gimp (as a pair)
insert a bead
Details:
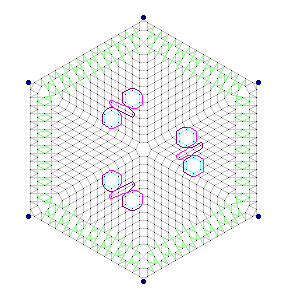
Torchon ground (grey)
Kat stitch (pale blue)
rose ground edge (green)
bee
hexagonal mat
how to finish
Description:
Follow the links above for explanation of how to work the different parts of the lace.
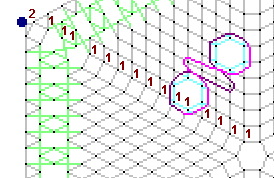
The start is along a diagonal, so one pair starts at each pin, and two at the edge. Above, I have marked the position of the false pins. This means that you hang the pairs from these pins to start, and after the first stitch, you remove them and pull the threads down to rest on the first proper pins. So ignore the gimps surrounding the bee. This will be done at the end of the lace, not the start. You work a sixth of the mat, then turn the pillow to work the next sixth. I have left out the dividing line between the different sixths, as it would interfere with showing where the bee gimp pairs went.
The bees are each surrounded by two gimp pairs which need to be started and finished for each bee. The wings of the bees are a single unit of Kat stitch and the body is Torchon ground. Click here for more detail about working a bee.
The beads were added by threading them on the outer edge thread from the start. Click here to see how to do this. That means that the edge stitch must always be cloth stitch and twist, pin, cloth stitch and twist, so the thread with all the beads on stays at the edge!
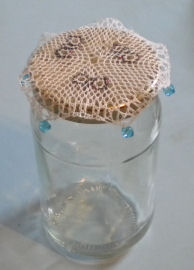
Here is a picture of the cover on a jar.
© Jo Edkins 2017 - return to lace index